Details

Specs
| Power: | USB(I) or JST (2P PH) |
| JST voltage: | 6V~9V continues (15V max)(II) |
| Current draw: | 130mA |
| Controller: | Xtensa® 32-bit |
| WiFi: | 802.11 b/g/n 2412 ~ 2484 MHz |
| Operating Temp: | -10 ~ 50 °C |
| IP Rating: | No protection |
| Dimensions: | Width 55mm (2.15"), Length 100mm (3.95"), Height 80mm (3.15") |
| (I) Use separate (low noise) adapter to avoid noise (see power options) | |
| (II) Voltages above 10V will cause excessive heat (see power options) | |
| (Short JST pigtail is included, USB Cable is NOT included) | |
| Insertion Loss: | <0.05 dB |
| Directivity: | >25 dB |
| Freq. accuracy: | ~1k |
| Freq. range: | 1.8 ~ 30MHz(I) |
| Power range: | 5 ~ 100 Watt(I) |
| Max Power: | ~125 Watt(II) |
| (I) RF Power Nanny is accurate in this range | |
| (II) Tested for up to about 125 Watt, higher power levels not advised | |
General Usage
RF Power Nanny, like any other power/swr meter, is used in-line between your radio and antenna system. If you are using an external tuner you can put Power Nanny before or after the tuner, depending on what you want to measure. Usually, you would put it after the tuner to measure your output to the antenna system.
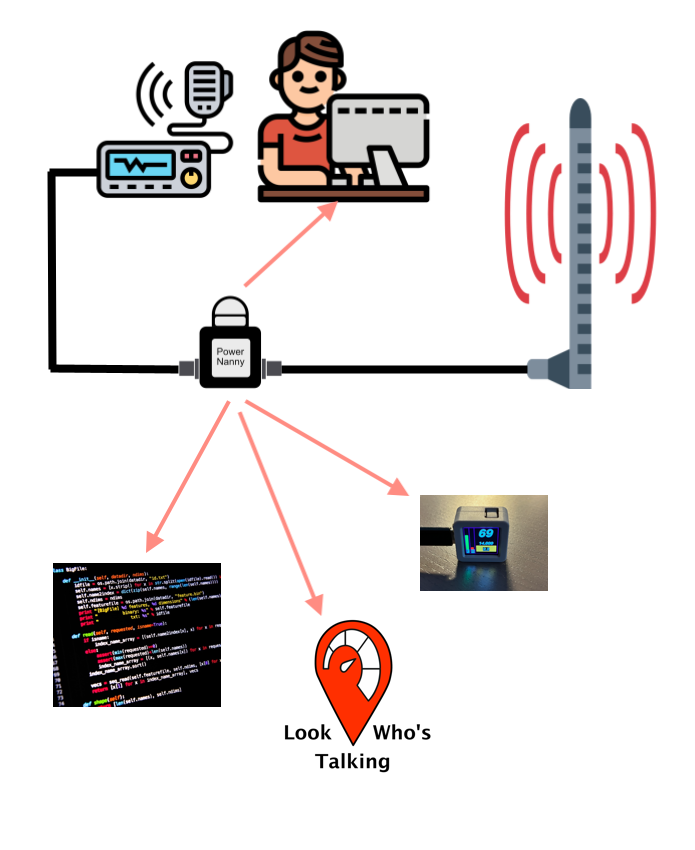
With a conventional power meter, you would look at the meter itself, so it would have to be in sight. This isn’t the case with RF Power Nanny though. You can (if you like) have it out of sight. You use your PC, tablet or phone for monitoring. You can also use a dedicated screen like a small M5Stack display.
For automated testing or other custom purposes, you can use the API to get power readings.
Another great feature of RF Power Nanny is that it can share your transmit activity. Other operators can then use the “Look Who’s Talking” web app to see your activity in real-time. The sharing of your on-air activity is optional and can be turned on or off at any time.
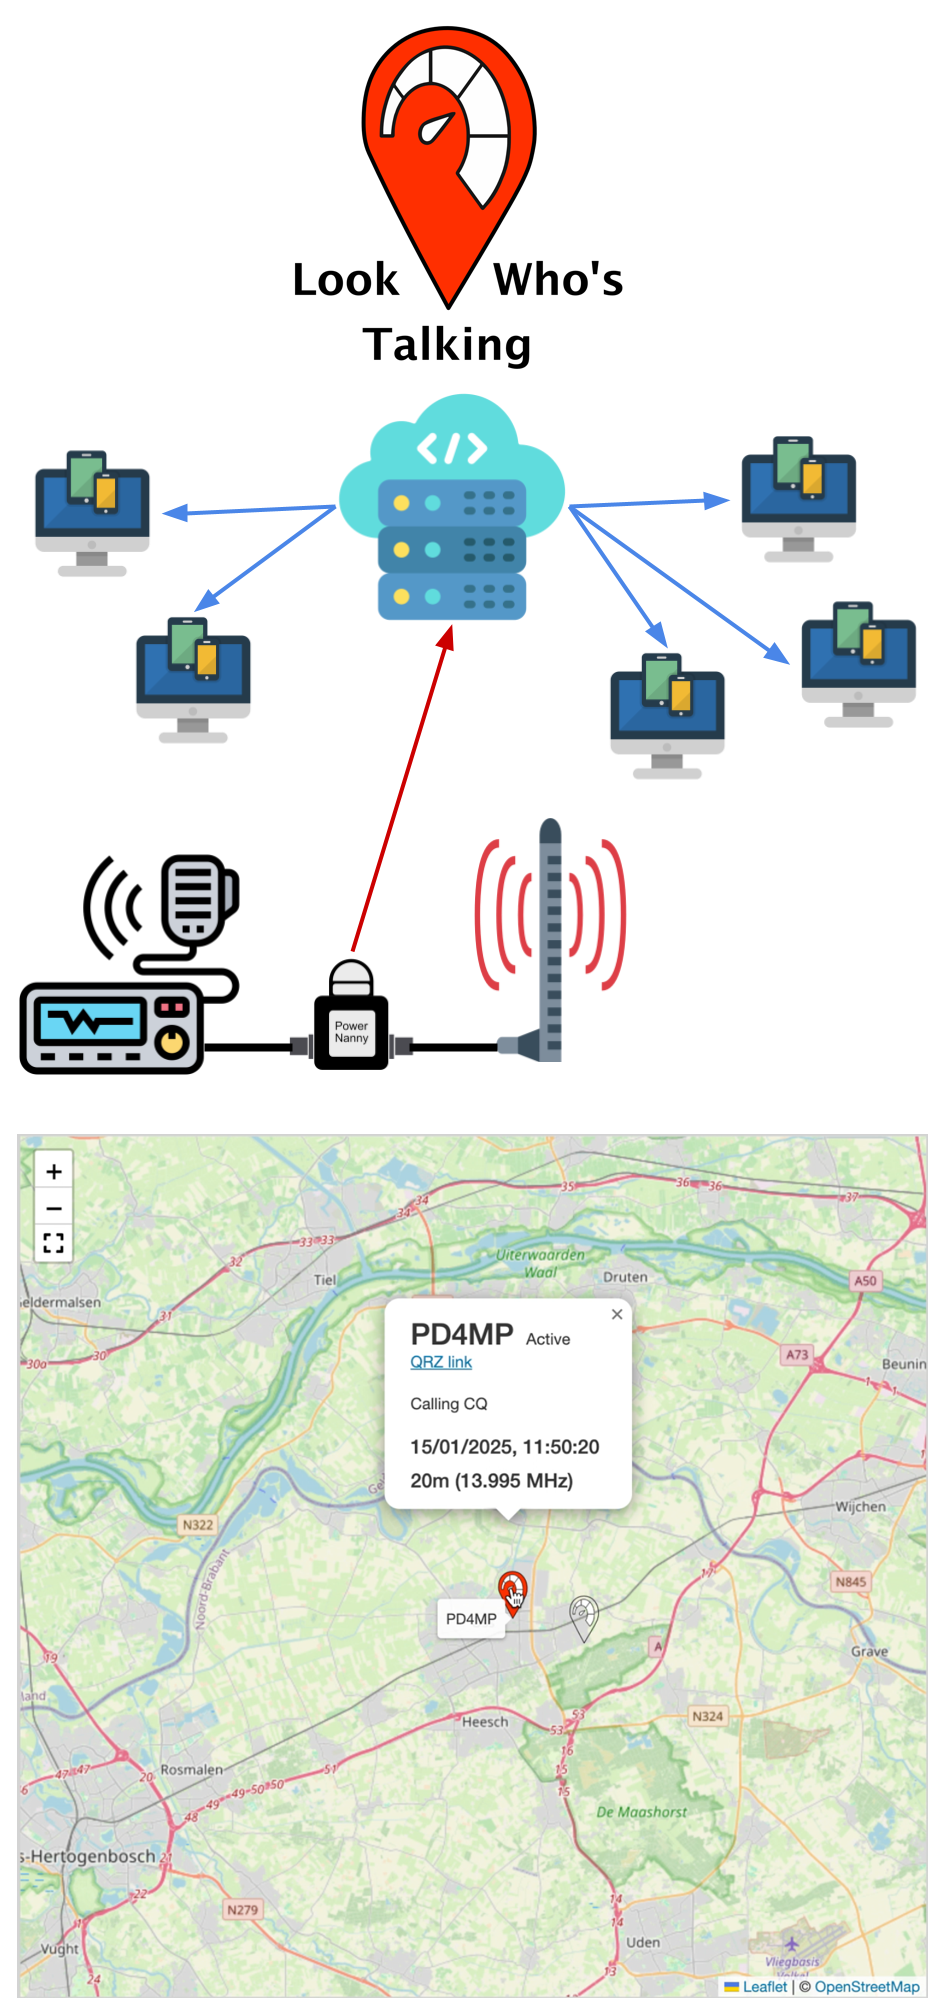
Other operators just need to go to the public webapp “Look Who’s Talking” to see in real-time if you are active or not and at what frequency.
Block Diagram
Block Diagram